

MinnowBoard Max quick setup guide
• Single board computers with the most popular among them being Raspberry Pi are usually based on ARM processors. Only few single-boards computer have x86 family processors on board. The MinnowBoard project is among the second group with its second generation i.e. MinnowBoard Max based on 64bit Intel Atom processor. Since the ARM based systems bring the unfamiliar new architecture for most users, Minnowboard Max can be truly seen as a single-board "old-fashion PC".
• The x86 architecture allows for installation of most of the available operating systems and more importantly installation of commercial software available only in binary form. Since the board works on x86 processor the list of supported operating systems include Linux, Windows and Android.

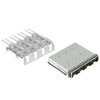
• MinnowBoard Max comes in two versions which have different processor and the amount of memory. The first one based on Intel Atom E3815 (single core, 1.46 GHz) with 1GB of RAM and the second based on Intel Atom E3825 (dual core, 1.33 GHz) with 2GB of memory on board. The rest of the specification is the same for both boards and features Intel HD graphics, micro HDMI connection, Micro SD card reader, SATA connection, one USB 2.0 and one USB 3.0 connections, 1Gbps Ethernet card, GPIO pins. The board includes also number of expansion ports like SPI, I2C, PCIe and JTAG.
In the box
• In the box you will find the single-board computer (with dimensions 99mm x 74mm) and a power supply. There are various ways to install the operating system and have a small desktop replacement. We will choose to install the SSD drive and have the Linux operating system boot from the drive. The UEFI allows you to boot from all interfaces including SATA, SD and USB.
Hardware preparation
• Although the MinnowBoard Max comes with numerous interfaces you will most likely need some additional converters and wires to make configuration like our work.

HDMI Monitor
• The only video output in the MinnowBoard Max is the micro HDMI. To be able to use the connection you will need micro male to full female HDMI converter. HDMI also includes audio as the only output from the board (no mini jack for speakers or headphones is installed).
USB Hub
• The board comes with two full size USB ports. One of them is dedicated as USB 2.0 and the other one as USB 3.0 (the blue one). To make the MinnowBoard Max fully usable computer you will need a keyboard, mouse and probably a USB WiFi card. Only 2 USB ports will not support the configuration and the USB hub is a requirement (either USB 2.0 or USB 3.0 will work fine).
SSD Drive
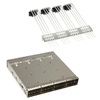
• MinnowBoard Max includes the SATA data connection but unfortunately there is not a traditional Molex power connection. Most of the SSD drives are shipped with the 4 pin Molex to SATA power converter. We will use that type of cable to power the drive directly from the MinnowBoard Max extension pins.
• SSD drive operates on 5V power (check if the same is true for yours). The board includes 2 pins in positions 1 and 2 marked as Ground and 5V. We will only need two of the four Molex power cables. Black wire is for ground and the red one is for 5V. Remaining two can be removed. Use female pins and housing for the wires on the Molex connection side. Connect to the long string of pins close to the power input. Counting from the corner in the outer row, the 2 first pins are ground and 5V. Make sure you use the right pins.

Arch Linux installation
• For the installation of Arch Linux we will use a bootable USB stick which is capable of booting both EFI and legacy BIOS systems. Since the MinnowBoard Max uses UEFI firmware we will take advantage of the first one.
Bootable USB
• Prepare a bootable USB stick with Arch Linux.
Network
• We will use an Ethernet connection to the Internet which will be discovered during the booting from the USB stick (our connection will support DHCP provisioning of IP numbers and network configuration).